How to Install a Tumble Dryer
Here you will find tips on how to install your new appliance. Be aware that installation methods and measurements may vary from model to model. It's important to check the installation manual for model-specific details.
Exhaust outlets for vented dryers
Please note this is only applicable to vented dryers.
Condensation outlet
If there is a high level of condensation in the exhaust air duct, it is advisable to fix a condensation collector (standard) or a drain hole with a diameter of approximately 3mm to the lowest part of the exhaust air duct.
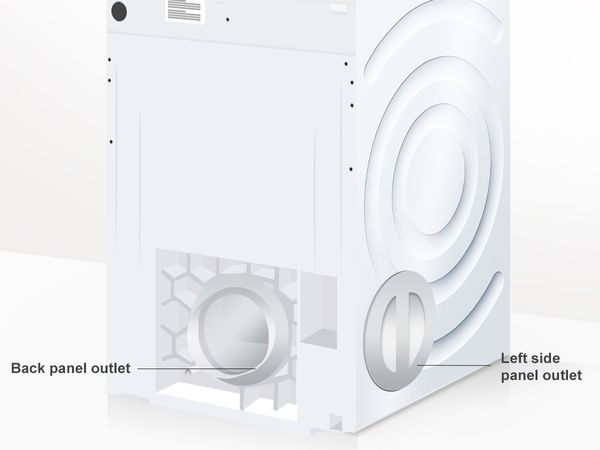
Outlets for the exhaust air duct are located at the back and left side panels of the dryer. Please note that this is only applicable to vented dryers.
Left side panel connection
Step 1: The exhaust port on the left side panel is sealed with a removable cover.
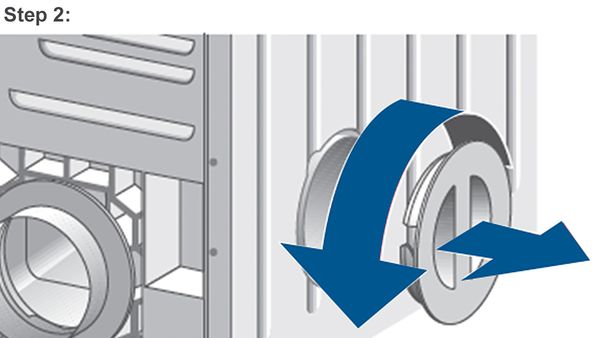
Step 2: Twist the cover on the side panel in an anti-clockwise direction to loosen and remove it.
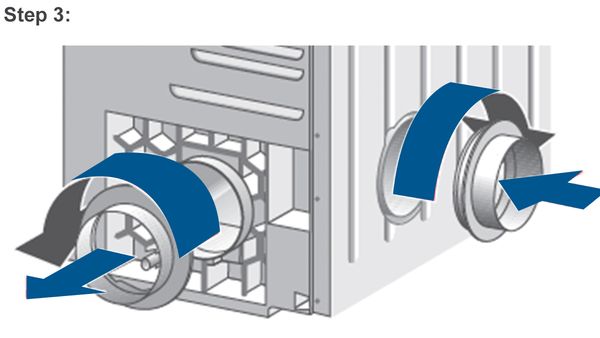
Step 3: Twist the bayonet ring on the back panel in an anti-clockwise direction to loosen and remove it. Attach the ring to the side panel exhaust port by turning it in a clockwise direction.
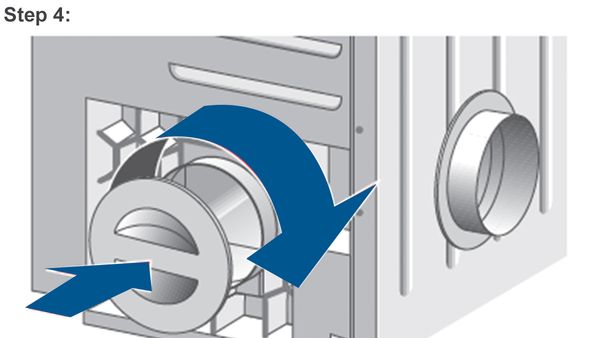
Step 4: Attach the panel cover to the back panel and twist in a clockwise direction to seal the exhaust port.
Back panel outlet
The exhaust port on the back panel is open when the dryer is delivered (bayonet ring).
Installation options for the exhaust air duct
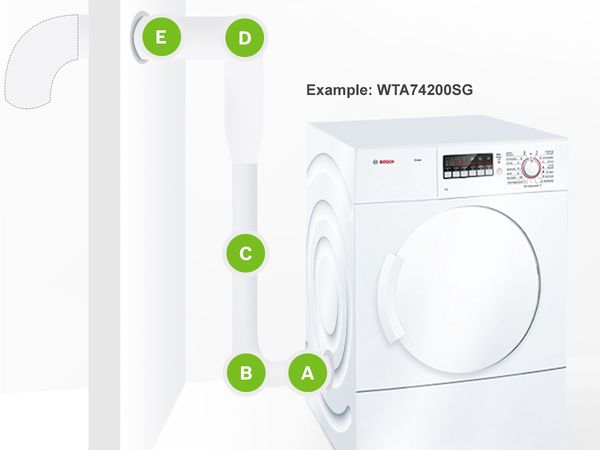
- Run the exhaust air duct in a way that ensures that the moist air expelled does not get drawn in by the dryer again.
- The duct should spread out with a 90 degree bend to prevent air backflow, with the end part of the duct facing downwards to the floor.
- The end section of the duct should not be more than 2.5m higher than the exhaust port on the appliance.
Example:
Pipe connection - inside diameter = 100mm, smooth
A = straight piece
B = curved pipe
C = straight piece
D = pipe elbow
E = telescopic wall box with grid
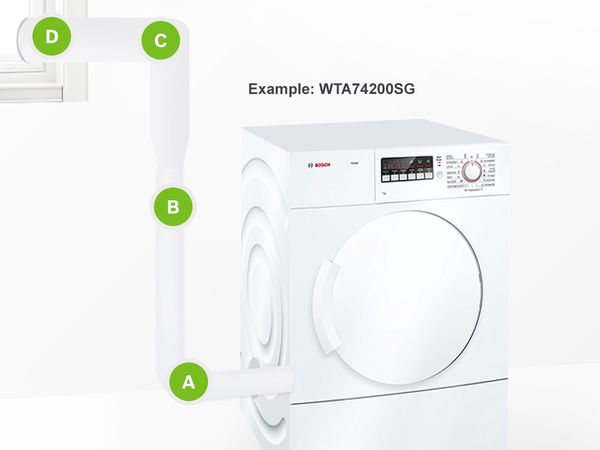
- Route the exhaust air directly into the open air via an exhaust air pipe through an open window.
Example:
Pipe connection - inside diameter = 100 mm, flexible pipe, corrugated
A = curved pipe
B = straight piece
C = curved pipe
D = straight piece
Installation of stacking kit
* This is applicable to both condenser and vented dryers.
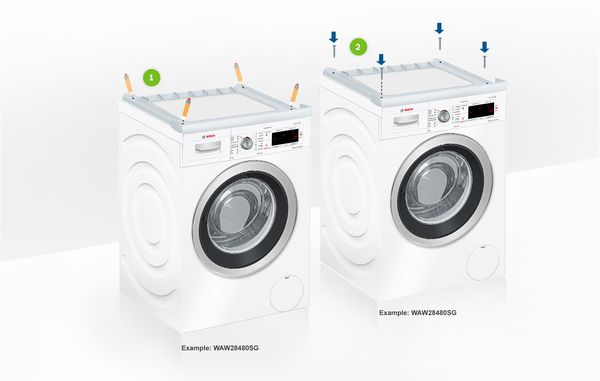
1. Locate the holes that need to be drilled into the washing machine for mounting the stacking kit.
2. Drill holes based on the markings made and secure the stacking kit on top of the washer with the screws.
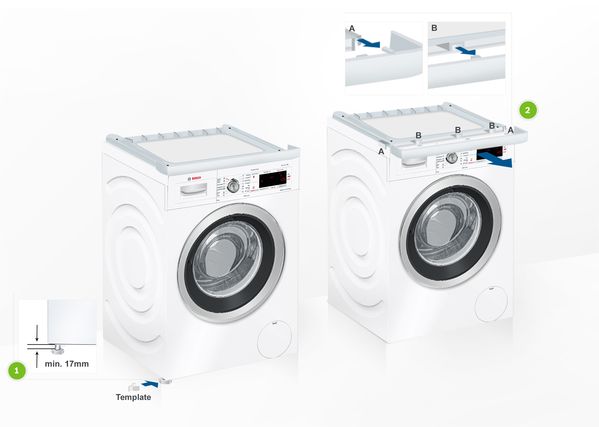
1. Using the template provided, adjust the height of each foot of the dryer.
2. Remove the brackets on both sides of the stacking kit.
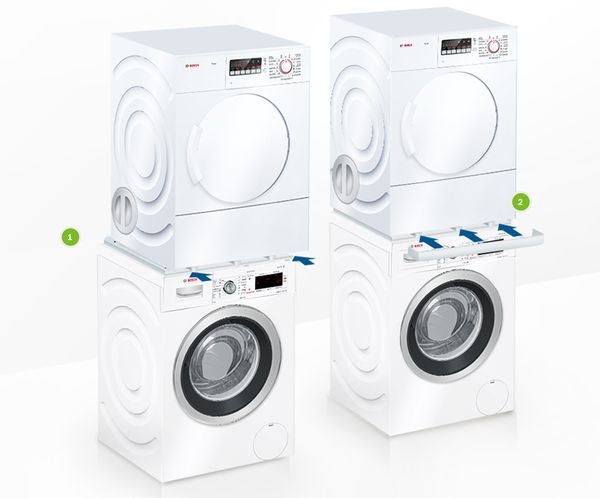
1. Place the dryer on top of the washing machine and slide in via the groove of the stacking kit.
2. Place back the brackets and secure with the screws provided

